Events
Events allow you to make things happen at different times of the game, independent from whatever the user types at the prompt. This can be one of two ways - after a set number of turns from something, or after a set amount of time from something.
Examples of typical events might be a day/night system, or a random event such as weather.
Event Control
Clicking on the Event button on the ribbon toolbar brings up the following window:
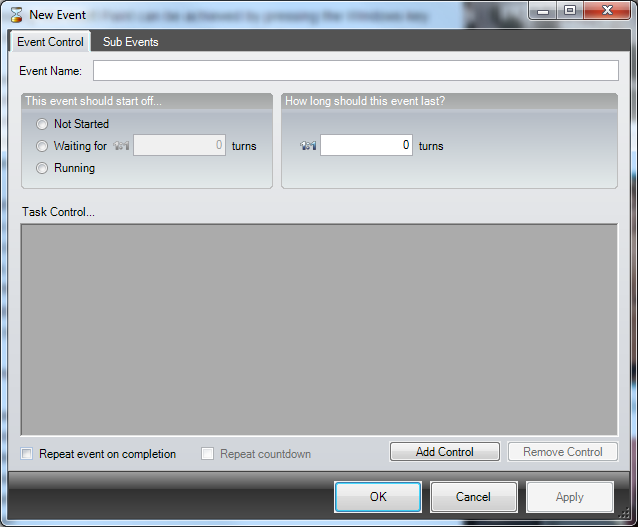
The Event Control tab allows you to control when the event runs. This works in a similar way to Character Walk Control.
Event Name is only used with Developer, to help you uniquely identify the event.
You can choose whether you want the event to start off immediately (Running), after a certain delay from the start of the game (Waiting for X turns), or whether it should wait until triggered by something else (Not Started). If you choose Waiting for X turns you can set this to a fixed number of turns, or a random number of turns between two values by clicking on the 1:1 button.
You must also specify how long the event should last. This can be a fixed number of turns, or a random number of turns between two values (by clicking on the 1:1 button).
Unless you have set the event to start immediately or after a certain number of turns, you will need to use Task Control to start the event after a particular task. To do this, click the Add Control button. This will add a section to the area in the bottom half of the form where you can choose to Start, Stop, Suspend or Resume the event. The difference between Suspend and Stop is that any stopped event will start again from the beginning, whereas if the event has been suspended, it can be resumed from it's current position.
Each Task Control is triggered by the completion or uncompletion (an action unsetting) of a specific task.
The  button can be used to create a new task.
The Repeat event on completion checkbox at the bottom left can be ticked to have the event repeated continuously, otherwise it will run once and then stop.
|
ADRIFT will not allow an event to loop if it's length is 0. This is because it would create an infinite loop. |
If you have set the event to repeat on completion, and also you have specified that the event should start off waiting for X turns before starting, the Repeat countdown checkbox becomes available. If you select this, when the event finishes, rather than restarting immediately it will wait for the specified number of turns again. If this was set to a random number between two values, subsequent runs of the event will also have a random delay.
Sub Events
Sub Events are the actual things you want to happen during the event. Often this is just displaying particular text. However, you can also run and unset tasks, or have different text permanently appended to various location descriptions.
The Sub Events tab looks like so:
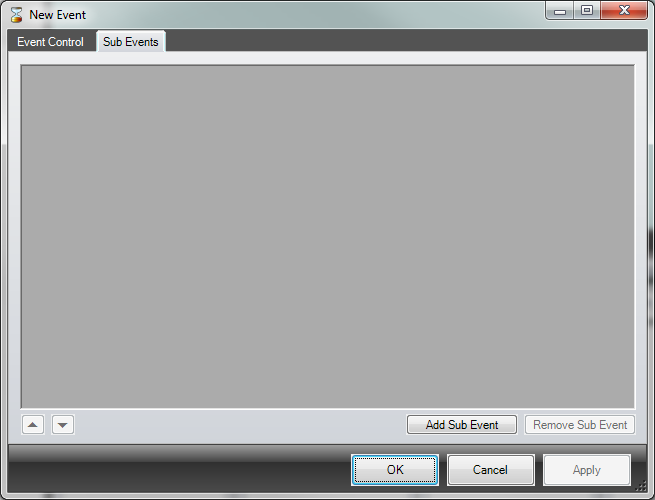
Click Add Sub Event to add a sub event to the event.
The first thing you need to decide is when the sub event should occur. This can be:
Turn based triggers:
Time based triggers:
All values you specify for X can be an exact value  or a random value between two numbers
  . You can toggle this by clicking on the 1:1 button.
Once you have specified when the sub event should start, you need to select what you want the sub event to do. The choices are:
 icon. If the player is not in a location specified here, the message will not be displayed.
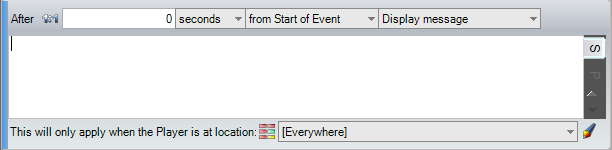

You can change the sequence in which sub events run by clicking on the Up/Down arrows in the bottom left of the screen.
