Creating Your First Game
We are going to create an adventure where you are Jack, who stumbles upon a magic bean. If you plant the bean, it will grow into a beanstalk. To win the game, you must climb the beanstalk.
|
Look for the JackAndBeanstalk.taf file in the Samples folder for an example you can load up. |
Introduction
Start up Developer, or select New from the main menu.
From the main menu, select Introduction & End of Game, like so:
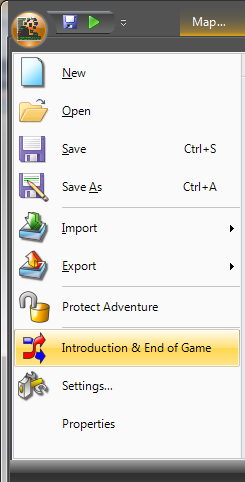
This will bring up the Introduction & End of Game editor. Give a short introduction to your game, like so:
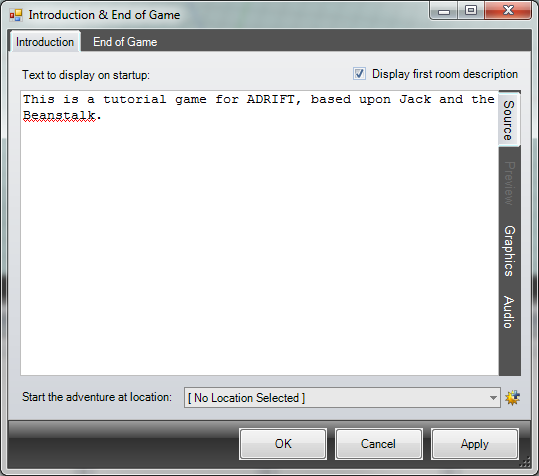
We haven't yet created any locations, so don't need to worry about the dropdown. If you do not specify a location in this dropdown, ADRIFT starts off in the first location in the game.
You can see the word Beanstalk has a red underline. This is because the spell checker does not recognise the word. If you want to add a word to the custom dictionary, right-click on it and select Add to Dictionary.
Click OK to add the introduction.
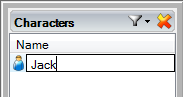
Jack
The Standard Library always creates a special character called Player. This is the character that you control as you move about the game. Because our character is called "Jack", we can simply rename the player character. To do this, right-click on the Player character in the Characters list and select Rename. This will put the character name into edit mode, where you can simply rename it.
We could edit the character if we wanted to change more things, such as putting restrictions on the number of items that can be held, or if Jack should start off sitting down.
Creating the locations
We want to create two locations. A cottage, and a garden.
In the Cottage
Click on the Location icon on the main toolbar.
This will bring up the Location editor. Enter a Short description and a Long description, like so:

Click Apply to create the location.
Because we have said there is a shelf here, we should add this to the location. The easiest way to do this, from the Location editor, is to select the Contents tab. Click on the Add Static Object button. (This button will be disabled if the location has not yet been added to the game).
This will now bring up the Object editor. You will notice that the initial location for the object has already been set to Single Location and In the Cottage, because you are adding the object to the location.
Give the object a name and description like so:
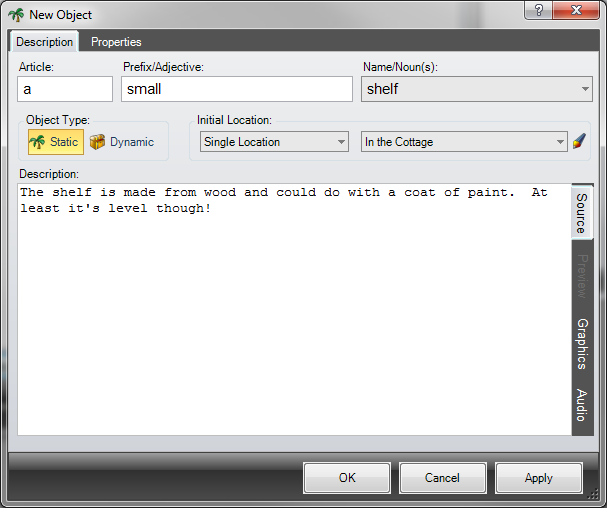
Because you can put things on shelves, we need to say that it is a "supporter". A supporter is any object that you can put other objects on top of. Click on the Properties tab and tick the Object is a supporter checkbox.

Click OK to add the object. You will now see it listed in the Contents page of the location. Click OK to update the location.
In the Garden
We also want to create an outdoor location, where we will be able to plant the bean.
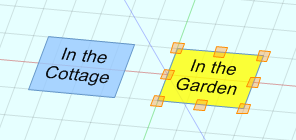
An alternative way to create locations is to add them directly to the map. Double-click on the map where you want the garden to appear. You will notice this creates a location on the map with the word [New Location] in square brackets. This is because the location name is in edit mode. Simply type to rename it, i.e. "In the Garden". Press <Enter> to apply the name. You should now have the following on the map:
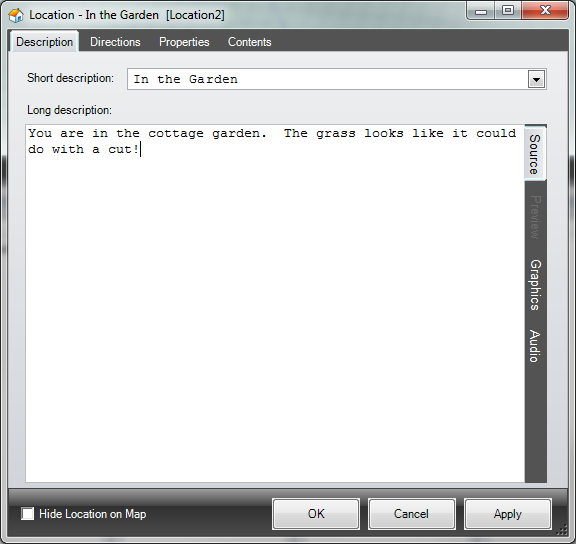
Double-click on your new location to edit it.
You will notice that the Short description has already been populated with the description you gave it on the map. So we just need to add the Long description, like so:
If you like, you can add "grass" as an object, in the Contents page, as the person playing the game will most likely examine it, since it has been mentioned in your location description.
Now that we have our two locations, we need to link them. If we were creating compass point links between the locations, we could do this directly on the map by clicking on an anchor (orange square). Because we want to link our locations with an In/Out direction, we must do this through the Directions tab.
Click Directions. This will bring up all the possible directions you can move to from this location. We want to be able to go In to the cottage from the garden, so select In the Cottage from the dropdown list next to Move In to.

Click OK. Because you have created a direction In to the cottage from the garden, it makes sense that you would also want to go Out from the cottage to the garden. ADRIFT pops up a question to ask if you would like to do so:
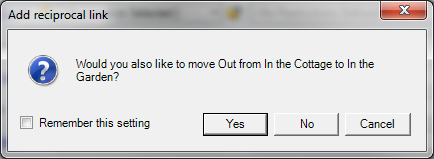
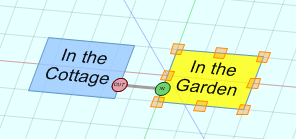
Select Yes. You will now see the two locations linked together. Each end of the link states "In" or "Out", depending which direction you must move to get to the other.
We have created a simple link between the two locations. The player is free to move in and out of the locations. If you wanted to enhance this further with a door that must be opened before being able to move, please see the Locked Doors tutorial.
The Bean
We could go to the complexity of creating a cow and a peddler, and having Jack exchange the cow for the bean. But in this sample we are going to keep it simple, hiding the bean inside a cow pot.
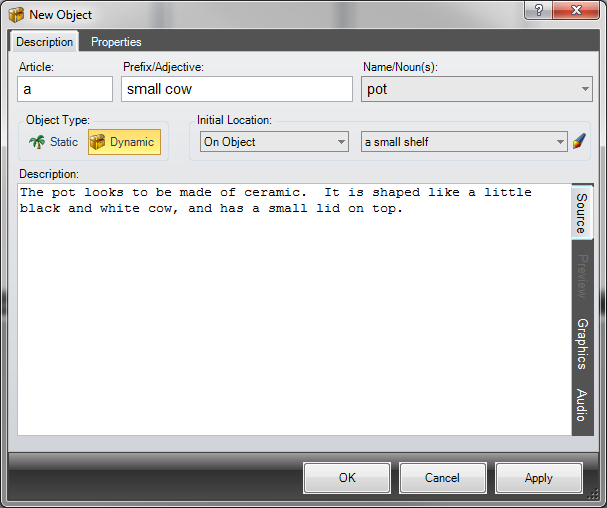
To create the pot, click on the Object icon on the main toolbar. This time, instead of creating a Static object (one that is fixed in a particular place), we want to create a Dynamic object (one that can be moved around).
Give the pot a suitable name, then set object type to Dynamic. This will modify the options available in the Initial Location dropdown. We want the pot to appear on the shelf inside the cottage, so select On Object from the dropdown. Because we defined the shelf as a supporter, it becomes available in the final dropdown, so select it. Finally, give the pot a description. The object editor should now look like so:
It is possible people might want to refer to the pot as simply "cow". To allow this, select the Name/Noun(s) dropdown, press <Enter> to get a new line, then type "cow".
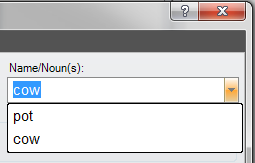
This creates two names the object can be referred by. Because "pot" is the first in the list, this will be the primary name used for the object.
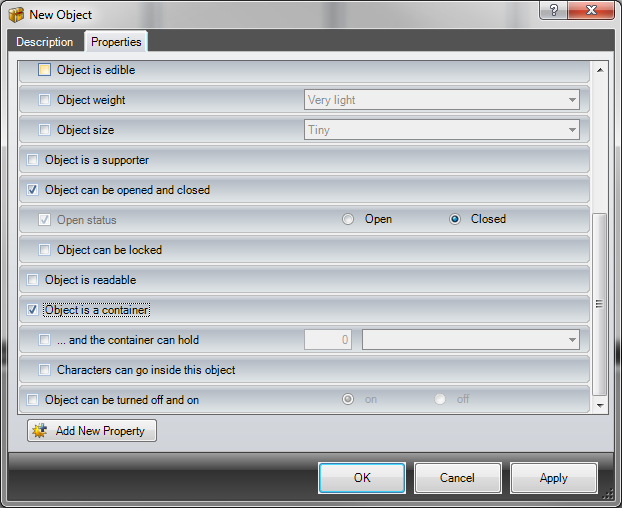
We want the pot to be a container, and also to make it openable. So, select the Properties tab, and tick those two checkboxes. Because we want the pot to start off Closed, change the Open status from Open to Closed.
Click OK to add the pot.
Now, to add the bean. As above, click the Object icon to create a new object. Again, this is a dynamic object, but this time we want it to start off Inside Object and inside a small cow pot.
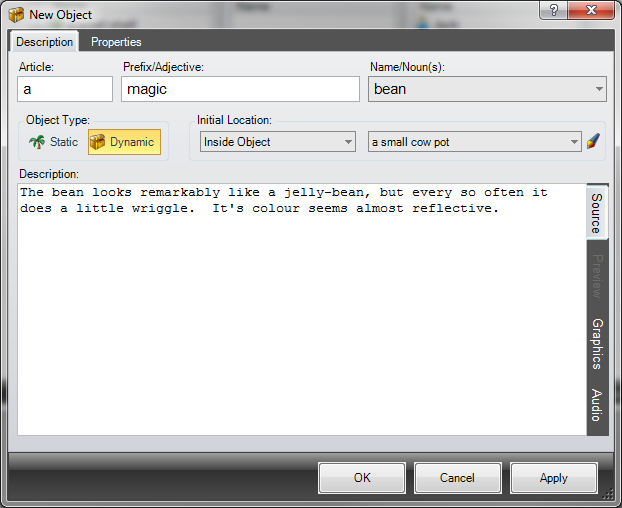
Beans are usually edible, so on the Properties tab, select the Object is edible checkbox. This simply means that if the player tries to eat it they will get a sensible reply, rather than a "You can't eat the bean" message.
Click OK to add the bean.
Planting the bean
We need to have a way of letting the player "plant" the bean. To do this, we need to create a task.
Normally in ADRIFT, you would override tasks in the standard library to create special cases of pre-defined commands. However, "plant" is not a verb that has been defined in the library, so we need to create this ourselves. To do this, click Task on the main toolbar to create a new task.
We need to create the general case for the plant verb. So we need to create a General task.
Give the task a sensible name, then create the command. This command is what has to be typed at the prompt in order for this task to match.

In the screenshot above, we have defined the verb as [plant/bury]. This uses Advanced Command Construction so that the command will match on either the verb "plant" or "bury". We then define the noun using an Object Reference. This will match against any object in the game (so for example, the task will now match both "plant bean" and "bury pot").
Because this is a general task, we want it to be repeatable, so leave the Task is Repeatable checkbox selected.
Since the general case for a verb will be what is run on all objects other than ones we want to do specific things with (e.g. plant the pot, plant the hammer, plant the phone etc), the response should be relatively dismissive. So here, we simply say that planting the object isn't going to achieve much. We have used an Item Function to return the full name of the object the player referred to.
We have to put certain restrictions on this task. For example, we wouldn't want to allow the player to plant an object they're not carrying. So click on the Restrictions tab.
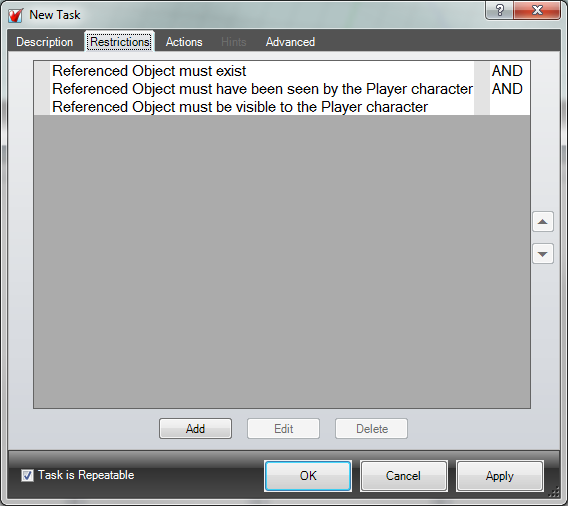
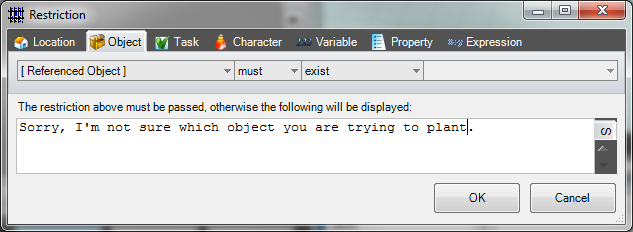
You can see that ADRIFT has automatically added three restrictions. If you edit each restriction (double click on it, or select it and click Edit), you will see the messages that will be returned if the player types the command and it fails at that point. ADRIFT tries to guess the response based on the command you define. In our case, because we gave two verbs, we need to do a little tidying up. So edit the first two restrictions, and change "plant/bury" to just "plant".
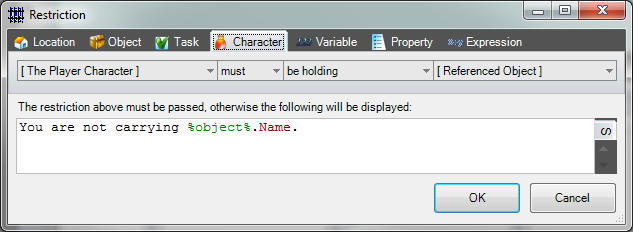
In addition to the three restrictions already created, we want to add a fourth because only want to be able to plant objects we are currently holding. So click Add to add a new restriction, then define it like so:
Lastly, we don't want to player to be able to attempt to plant any object indoors, so add a final restriction like so:
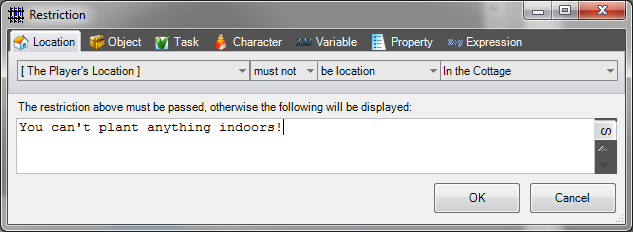
If we were creating a larger adventure, we could create a location group which contained all the indoor locations. We could then change the above restriction to say that the player must not be in group "indoor locations".
Click OK to add the restriction, then OK to add the task.
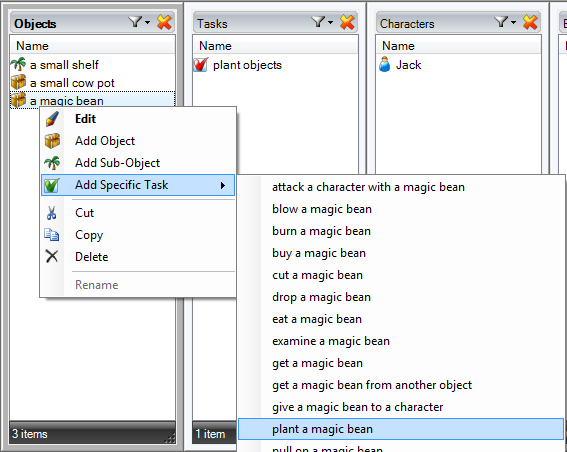
Now we need to create the special case of planting the bean. To do this, either click Task from the main toolbar, or even better, we can select the bean in the Objects list, right-click on it, then select Add Specific Task > plant a magic bean from the the menu.
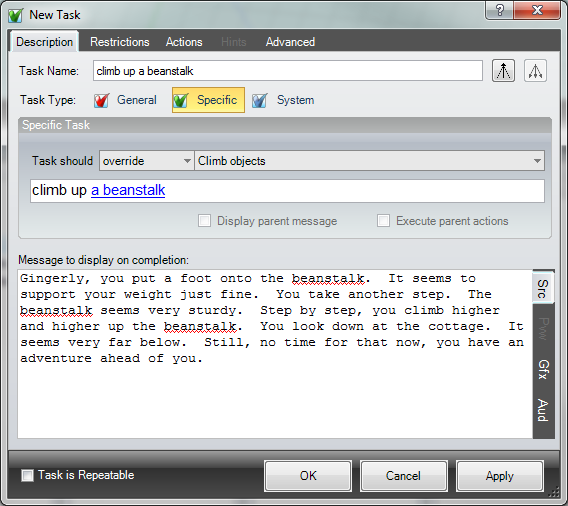
This will default some of the options in the Task editor. Fill in the rest of the details, like so:
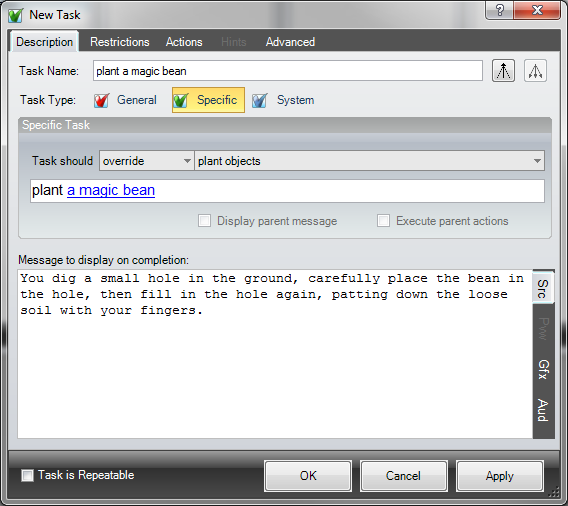
We want this task to override the default plant objects task we created above, as opposed to running before or after the general task. We want this task to just run for the magic bean object, and we do not want the task to be repeatable.
We don't need to add any restrictions to this task, because the General task already takes care of that (i.e. it already checked that we were holding the object in question, and that we were in a location where we are allowed to plant objects).
We do need to create an action though, as once planted, we need to object to disappear. To do this, click on the Actions tab, and click Add.

Configure the action, as above, then click OK.
Click OK to add the task.
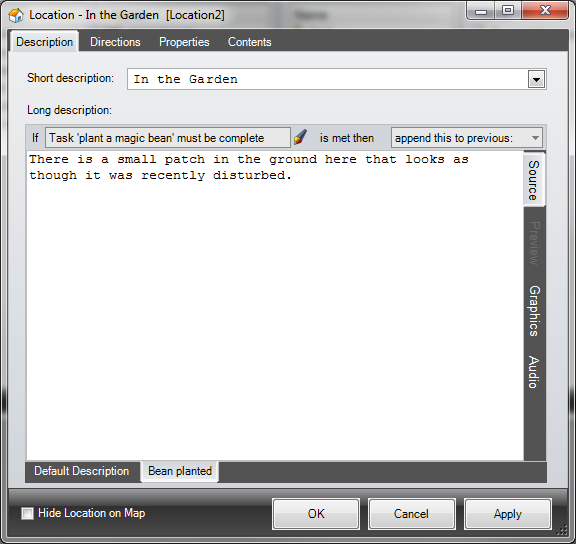
We can modify our In the Garden location to show that we have buried something there, by adding an Alternative Description. Double-click the location to open it, then right-click in the Long description box. Select Add Alternative Description.
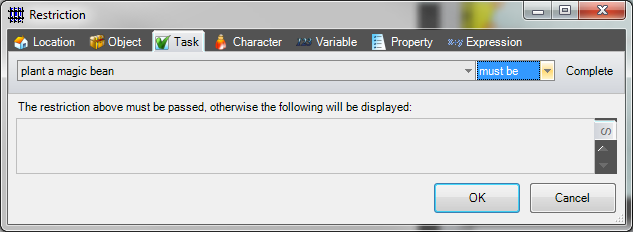
Here, we can add a restriction that must be passed in order for our additional description to appear. So click on the  icon at the top to create a new restriction, then add a restriction that the plant a magic bean task must be complete.
Click OK to add the restriction, then add an additional description (with append this to previous selected) to let us know that something has changed:
You can rename the alternative description tab by right-clicking on it and selecting Rename Tab.
The beanstalk
Once the bean has been planted, we want to have a beanstalk appear. We are going to have the beanstalk "grow" over a few turns, once the bean has been planted. As an additional exercise, you could make Jack have to water the ground first.
First of all, we need to create a beanstalk object. Click on Object from the main toolbar, and create a Static object. Because the object only appears once we have planted the bean, we can leave the initial location Hidden.
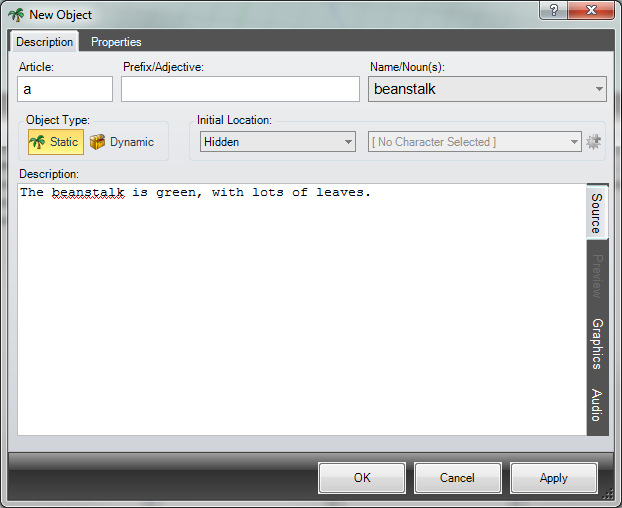
Click OK to add the beanstalk. We will come back to it later to improve the description.
To have the beanstalk slowly grow, we need to create an Event. Events are things that happen at set times in the game, independently of what the player types at the prompt.
Click Event on the main toolbar. This brings up the Event editor. Give the event a suitable name.
We want the event to start once the bean has been planted, so set the event to start off Not Started, but click on Add Control to start the event upon completion of the plant a magic bean task.
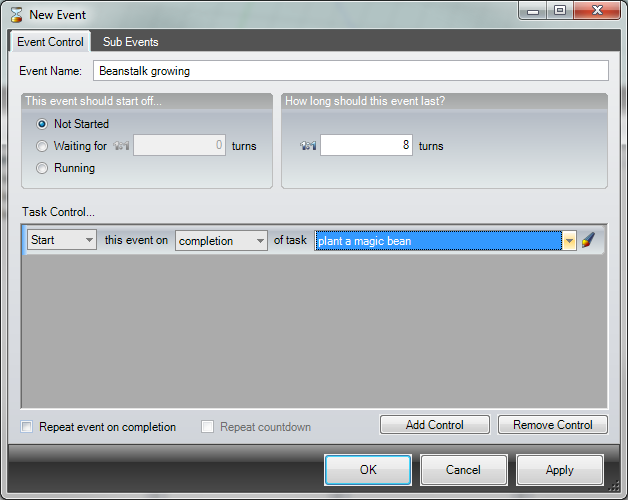
We want the event to run for 8 turns, so set this in the How long should this event last box.
Now for the interesting part. Click on the Sub Events tab. We want to create several sub-events to show the beanstalk growing.
Click Add Sub Event to add the first one. We don't want the beanstalk to appear immediately, so perhaps after 3 turns it should first appear. Because we need to actually move the hidden beanstalk to the location, we need to run a task here. So create the Sub Event like so:

Click on the icon to create a task to move the beanstalk. This will bring up the Task editor. This time, we want to create a System task, since the task is not one that we want the user to have to type something to run. Give the task a name (move beanstalk to garden), then click on the Actions tab. Create an action like so:

Click OK to add the action, then OK to add the task. This will update your Sub Event with the new task selected.
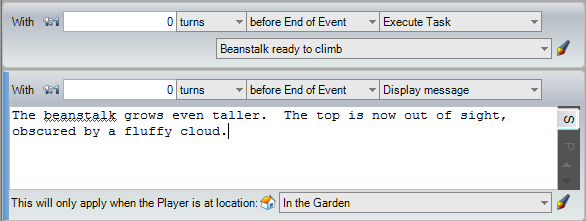
We also want a description to appear in the garden when the beanstalk starts to grow. We could have added this to the task above, but because we only want the description to appear in the garden, we would have to have added it as an alternative description based upon where the player currently is. It is easier to just add this as an additional sub event. So click Add Sub Event again, then create like so:
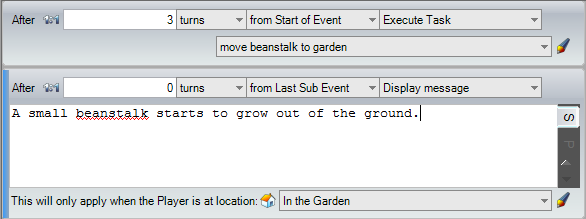
We want this sub event to start straight after the previous one (so 0 turns from last sub event), and we only want it to appear when the player is in the garden. To define this, you need to click on the  icon next to the dropdown to change it to a location list instead of a group list.
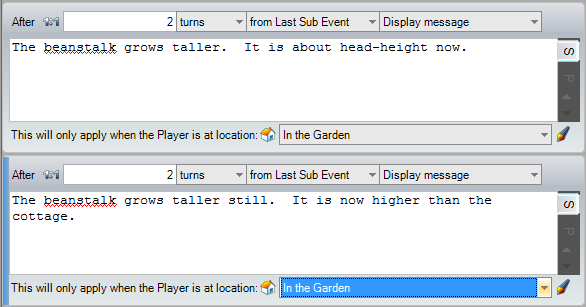
Add further sub-events to show the beanstalk growing:
Finally, at the end of the event, we need to mark the beanstalk as fully grown. There are several way to do this, but the easiest is to just complete a task. So, as before, create a sub-event that executes a task, and create a system task labelled "Beanstalk ready to climb". This need have no description, restrictions, nor actions as it is simply going to be used as a flag.
We can now click OK to add our event.
We can enhance our Garden location so that the beanstalk shows up once it exists. To do this, edit the Garden location, and create a new alternative description. Because there is an existing alternative description, you can simply click to the right of the existing "Bean planted" tab, to create a new alternative description.
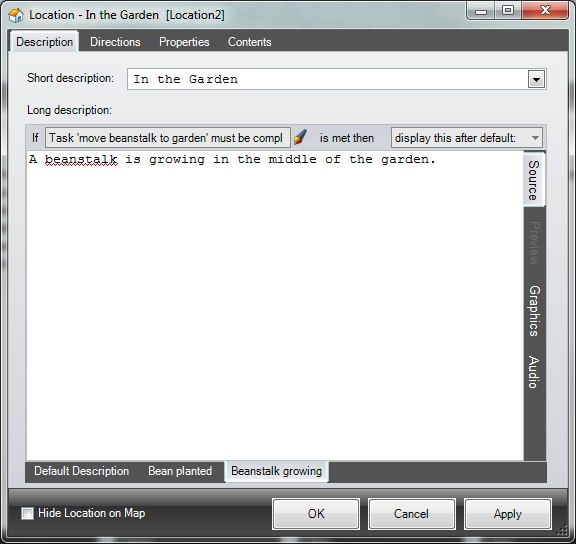
Add a restriction that the move beanstalk to garden task must be completed. If we select display this after default in the other dropdown, when this restriction is passed it will override the Bean planted description, and simply append to the Default Description. This gives us a handy way to layer up different descriptions based on different restrictions.
We can add a further description to show the beanstalk, ready to climb:

Click OK to update the location.
We can also modify the beanstalk object in exactly the same way:
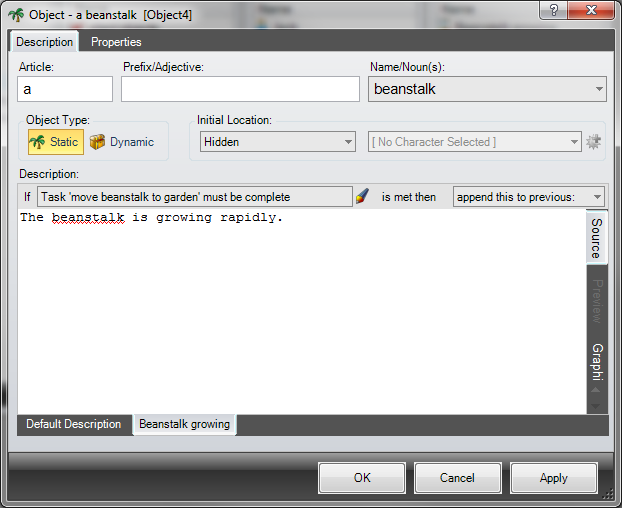
This description can be left at the default append this to previous setting.
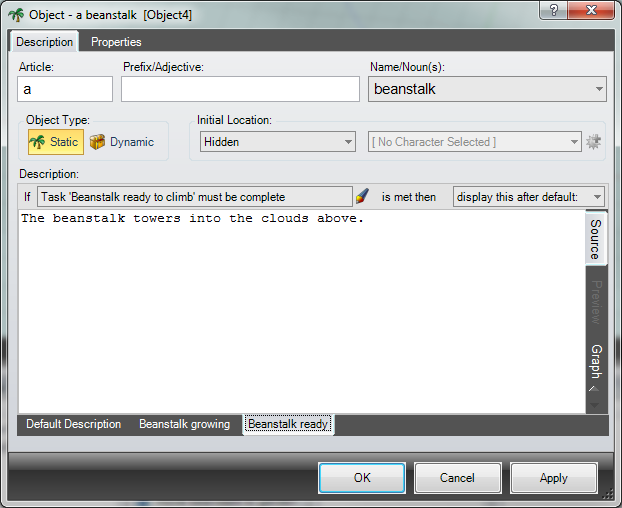
Again, note that this description is set to display this after default so that it overrides the description in the Beanstalk growing tab.
Climbing the beanstalk
Ok, so we're nearly there! To win the game, we need to climb the beanstalk. The standard library already comes with a Climb Objects task, so we simply need to override this.
So right-click on the beanstalk object, and select Add Specific Task > climb up a beanstalk.
One last thing - we don't want to be able to climb the beanstalk before it has fully grown. So we want to add a restriction on the climb beanstalk task, like so:
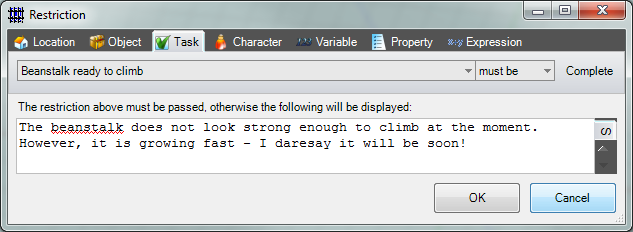
Click OK to add this restriction.
Winning the game
To win the game, we need to add an action to the climb beanstalk task, to end the game in victory, like so:

Click OK to add this action, then OK to add the task.
As a final touch, we can go back to the Introduction & End of Game editor, and add a final message. This will be displayed after any End Game action.
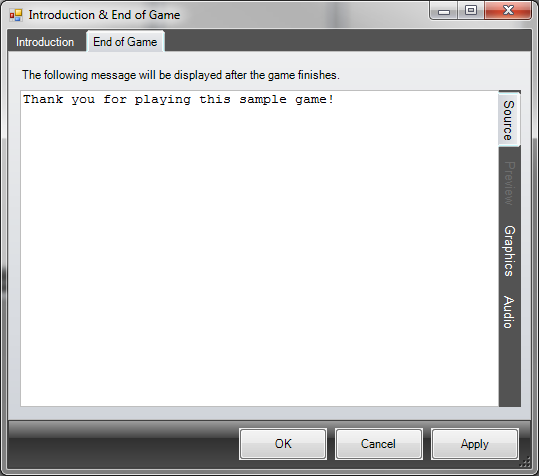
Now all you need to do is save your game, and play it!
For further examples, please see the tutorials section.
