Torches that run out
This tutorial will build on the Dark Rooms tutorial from the Beginner section.
By the end of this tutorial you should be able to create a torch with the following properties:
|
Look for the TorchBattery.taf file in the Samples folder for an example you can load up. |
The Torch
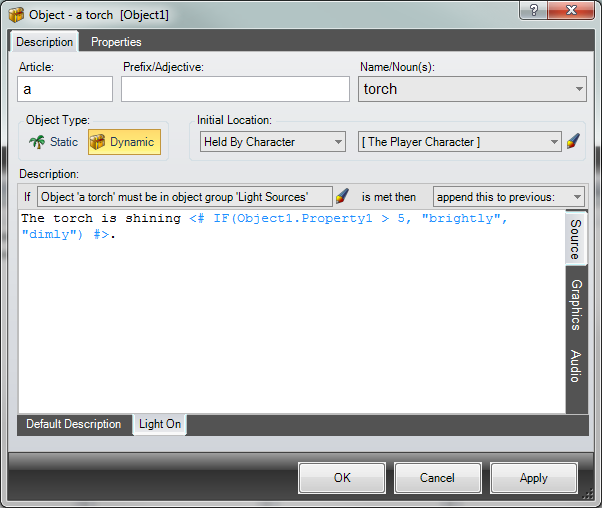
Firstly, we need to create our torch object. The torch is dynamic since we can move it about. However, we are going to be able to switch the torch on and off. Because the torch will initially be off, we don't need to mark it as being a light source.
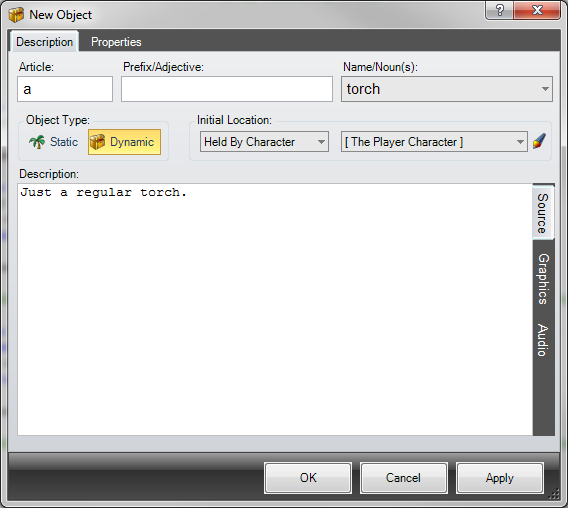
I have just placed the torch in the Player's hands.
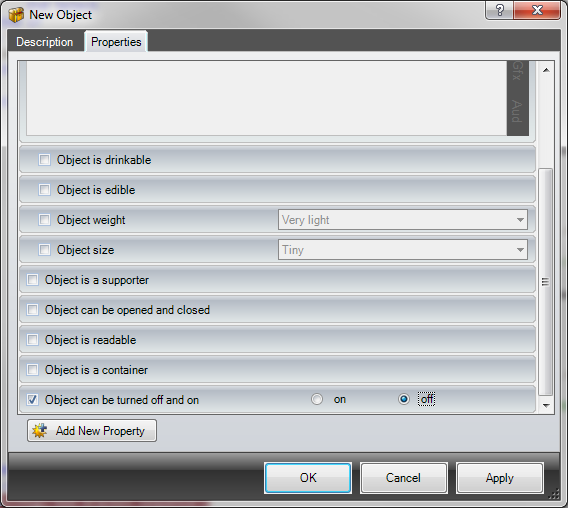
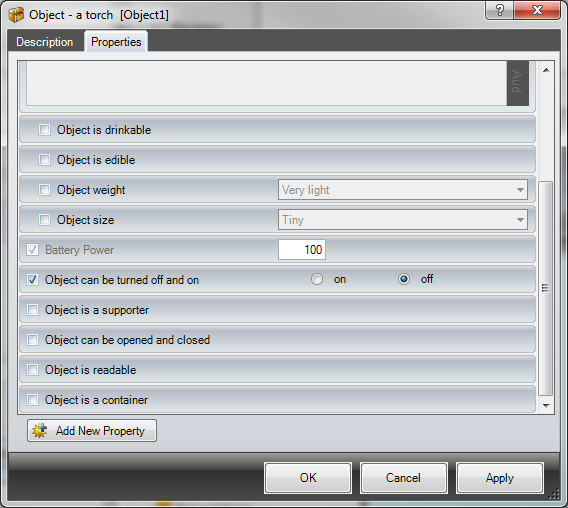
To make the torch switchable, select the Properties tab, then select the Object can be turned off and on property. Select off as the default value.
Now that we have made it switchable, we can use the status of the object within our description.
Click Apply to save the object. This will add the torch to the list of objects in Developer. Select the Description tab again and type " The torch is currently switched ". We need to get the object key. If you have the Show Keys on Edit forms turned on in Settings then this will be displayed in the object editor title bar. If so, just type it into the description. If not, then drag the torch object from the list in Developer onto the description of the torch. This will bring up a menu like so:
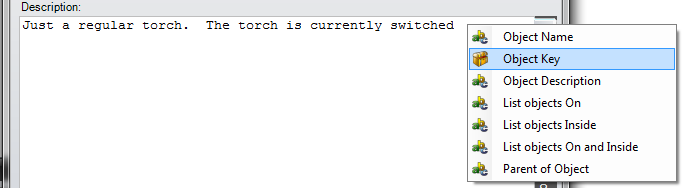
Select Object Key from the menu. This will insert the key into the description. We can now use an Item Function to get the current value of the On/Off property. Type a dot after the object key. This will bring up a menu of the properties that the object has. Select Object can be turned off and on, press Tab, and add a full stop after the function. This should now look something like so:
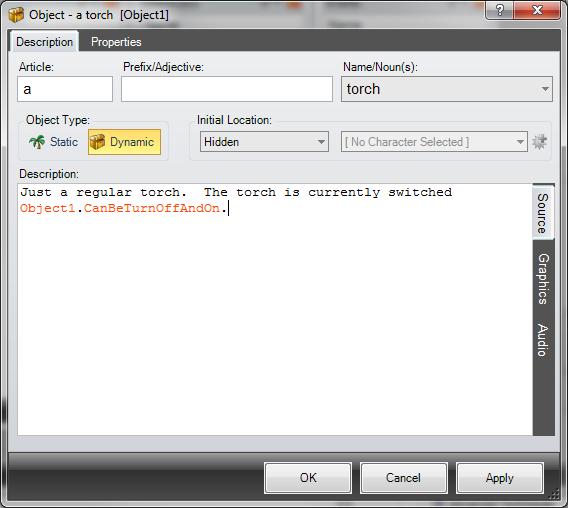
When we play the game, Object1.CanBeTurnOffAndOn will be replaced with either "on" or "off".
The battery
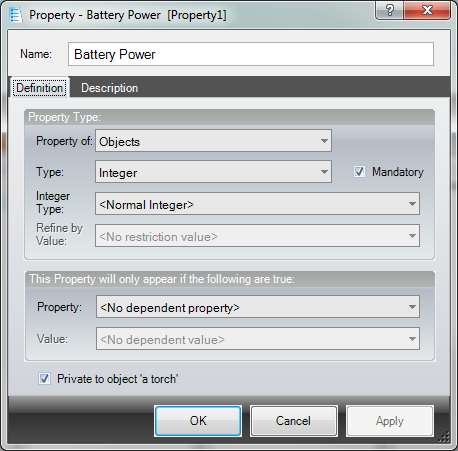
We are going to create the battery power as an Integer property of the torch. That is to say, an integer value (number) assigned specifically to the torch object.
Go back to the Properties tab and click on Add New Property. This will default the property editor to properties of objects.
Give the property a name, then set Type to Integer. Select the Mandatory checkbox because we want to enforce a battery power for our torch. We just want this to be a normal integer, so you can leave the next two dropdowns as they are.
We also do not need to worry about restricting the property, so leave the next two dropdowns as they are.
It wouldn't make any sense for any other object to have this property, so select the Private to object 'a torch' checkbox. This will prevent this property from appearing in any other object property lists. If you can't see this checkbox then it means you just clicked on Property from the main toolbar, and so ADRIFT doesn't know which object it might apply to. Either open from the object itself, or wait until you have assigned the property to a single item, and the checkbox will become available.
You should now have the following:
If you wish, you can also give the property a description like so:
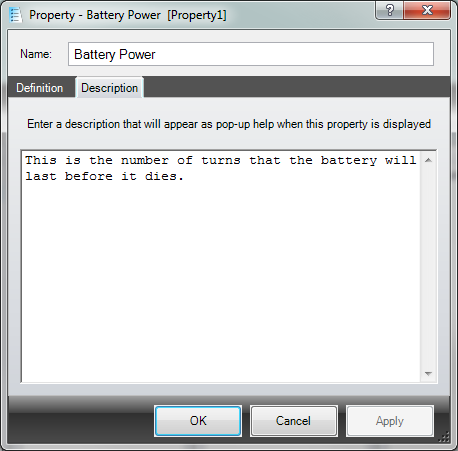
This will appear as a tool tip when you hover the mouse over the property in the Objects list.
Click OK to add the new property.
Battery Power should now appear in the list of properties for the torch, and will be pre-selected (since it's mandatory). Set the value to, say, 100. This will be the number of moves the player is able to make with the torch on before it runs out.
Click OK to add the torch.
Enabling Light
To enable or disable the torch from being a light source, we need to add or remove it from the LightSources group.
The trigger for adding or removing the torch from the LightSources group is when the torch is turned on or off.
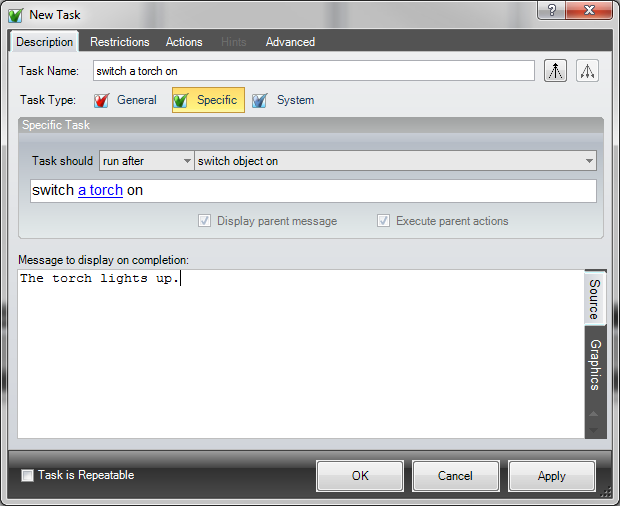
Select the torch in the Objects list, right-click on it and select Add Specific Task > switch a torch on. This will bring up the task editor, and default the settings to override the switch object on task.
We don't actually want to override this task - we just want to do something extra when it is run. So change the override dropdown and select run after. This means the normal behaviour for turning the torch on will still work.
Add a description, stating that the light has come on.
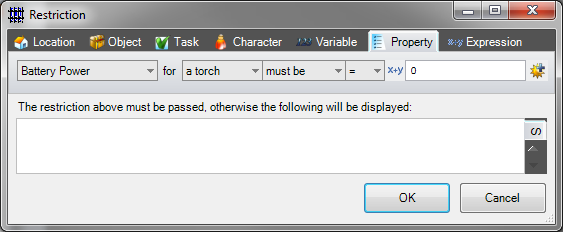
Because we only want the light to actually come on if there is any juice left in the battery, we need to add a restriction. Select the Restrictions tab and click Add.
Add a restriction that the battery power must be greater than zero, like so:
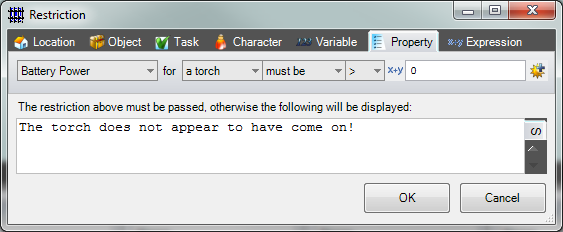
So now, if the player turns the torch on and there is no battery power left, they will be told that the torch has not come on, and we won't add it to the Light Sources group.
Now select the Actions tab. Click Add to add a new action.
Add an action to add the torch object to the Light Sources group, like so:

Finally, make sure you tick the Task is Repeatable checkbox, as we want this task to run every time we switch the torch on.
Click OK to add the task.
We now need to add a second task, this time to remove the torch from the Light Sources group when we turn it off.
So select the torch in the Objects list again, right-click on it and this time select Add Specific Task > switch a torch off. This will bring up the task editor, and default the settings to override the switch object off task.
Again, we don't actually want to override this task - we just want to do something extra when it is run. So change the override dropdown and select run after.
Add a description, this time stating that the light has gone off.

We only need to do anything if the torch is actually on, so add a restriction to say that the torch must be in the Light Sources group, like so:
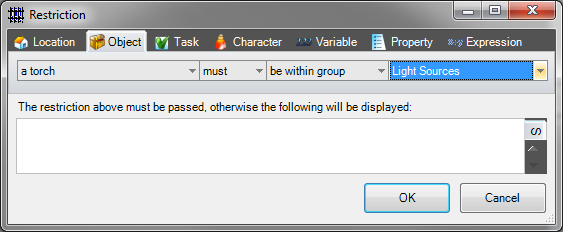
We don't need to add a message in the restriction, because if this restriction fails we just want the default message from the switch object off task to display, so just click OK to add the restriction.
Now select the Actions tab. Click Add to add a new action.
Add an action to remove the torch object from the Light Sources group, like so:

And again, make sure you tick the Task is Repeatable checkbox, as we want this task to run every time we switch the torch off.
Click OK to add the task.
Running down the battery
So now we have a fully functional torch that we can turn on and off. We now want the torch to slowly run out if it is left on. To do this, we need to use an Event.
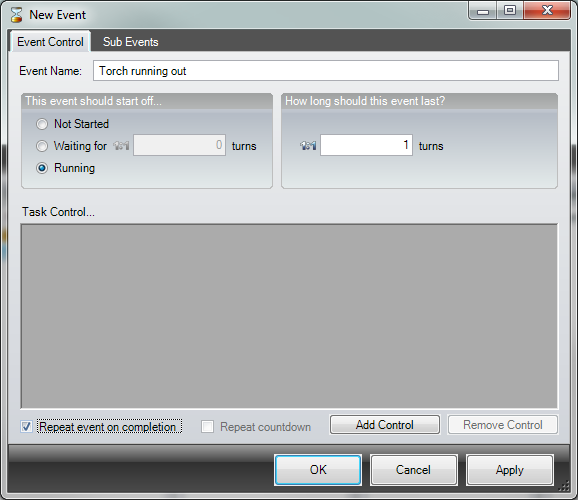
Click Event on the main toolbar to create a new event, and give it a suitable name for the torch running out.
Our event needs to be running all the time, as it basically has to monitor the torch. So the event should start off Running, should last 1 turn, and should Repeat event on completion.
Select the Sub Events tab, and click Add Sub Event.
We need to run a task every turn, which will check to see if the torch is on, and if so, decrement the battery. So select the following options in the sub event:

Because we haven't yet built the task we need to run, click the  icon next to the task dropdown to create a new task. This will bring up the task editor.
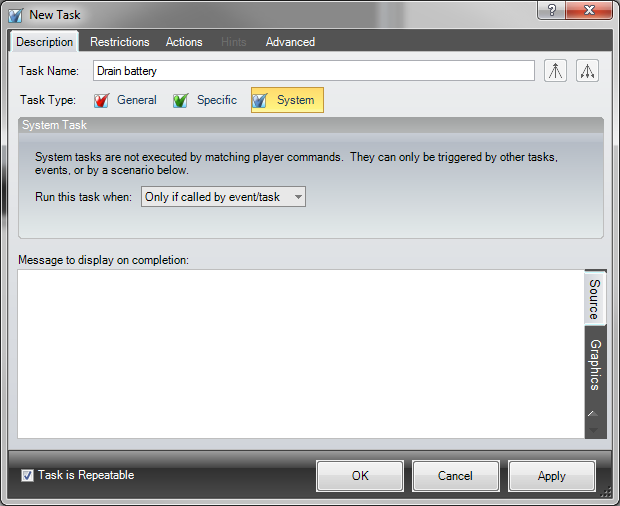
We want to create a task that can only be called from the event, so set the Task Type to System. This defaults to Only if called by event/task, so leave it on that setting.
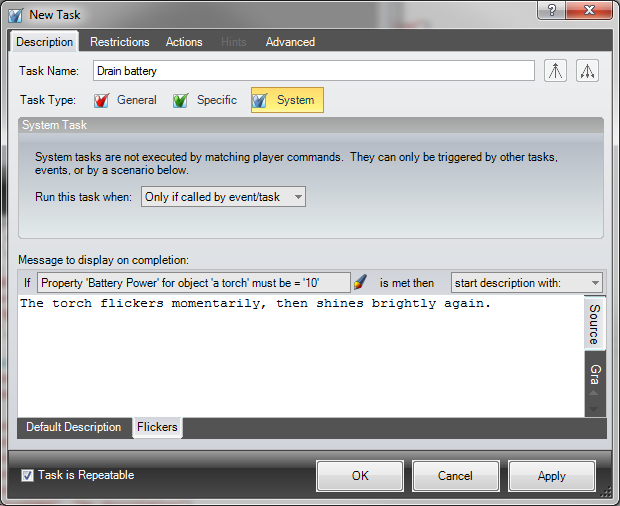
Give the task a suitable name, such as "Drain battery".
We need to add a restriction here so that the battery only drains if the torch is on. So set the restriction like so:

We don't want to have any output message here if the restriction fails.
If you wanted to, you could also add a restriction to say that the battery power of the torch must be > 0, just so we don't drain the battery below zero.
Click on the Actions tab, and click Add to add a new action.
We want to decrease the value of the battery power, so create an action to set it to the current battery power (Object1.Property1 in this example) minus 1.

Click OK to add the action, and Apply to apply the task.
It would be nice to give the player some sort of warning that the battery is running low. So go back to the Description tab, and add an alternative description. When the battery power has dropped to a set level (say 10), we want to display a message. So click on the icon to add a new restriction with the following settings:
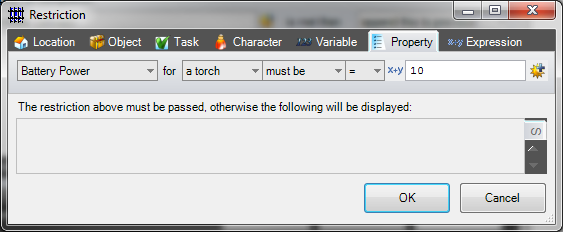
Click OK to add the restriction.
Add some text to give an early warning that the torch will run out. Set the description to start description with, and relabel the tab to something suitable:
You can continue adding more alternative descriptions for the torch running out.
Once you have added all the descriptions you want, click OK to add the task. It should now appear in the dropdown in the Sub Event you were creating. Click OK to add the event.
We can also use the fact that the torch is in the Light Sources group to say that the light is on, and the value of the battery power of the torch (Object1.Property1 in our example) to say whether the torch light is bright or dim, by adding an embedded expression in an additional alternative description for the torch itself, like so:
Killing the battery
Finally, once the battery reaches zero, we want to kill the battery and turn off the torch.
The simplest way to do this, is have the Drain battery task run a second task that will remove the torch from the Light Sources group if the battery power reaches zero.
So create a new System task which has a suitable description for the battery going dead:
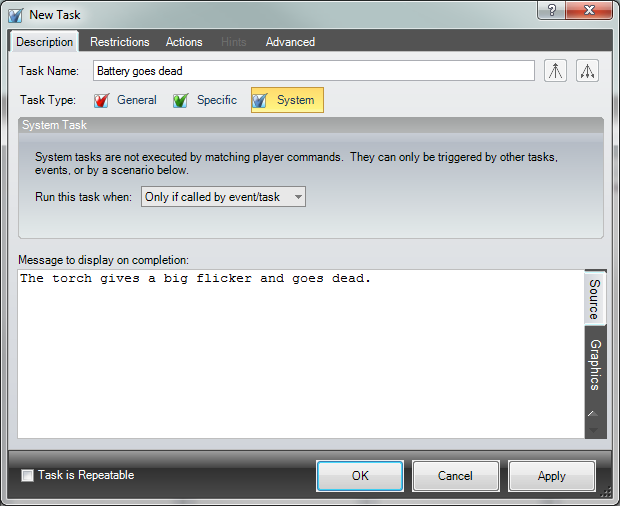
Add a restriction that the battery power of the torch is zero:
And add an action to remove the torch from the light sources group:
Click OK to add the task.
Now edit the Drain battery task and create a new action to (try to) run the Battery goes dead task:

Click OK to update the task.
And that's it! Save your game and try it out. Be sure to add some locations to the Dark Locations group so that they only show up when you have a lit torch with you.
